
STUDIO & PROCESS
My studio is my favourite place to be and to bring the outside in.
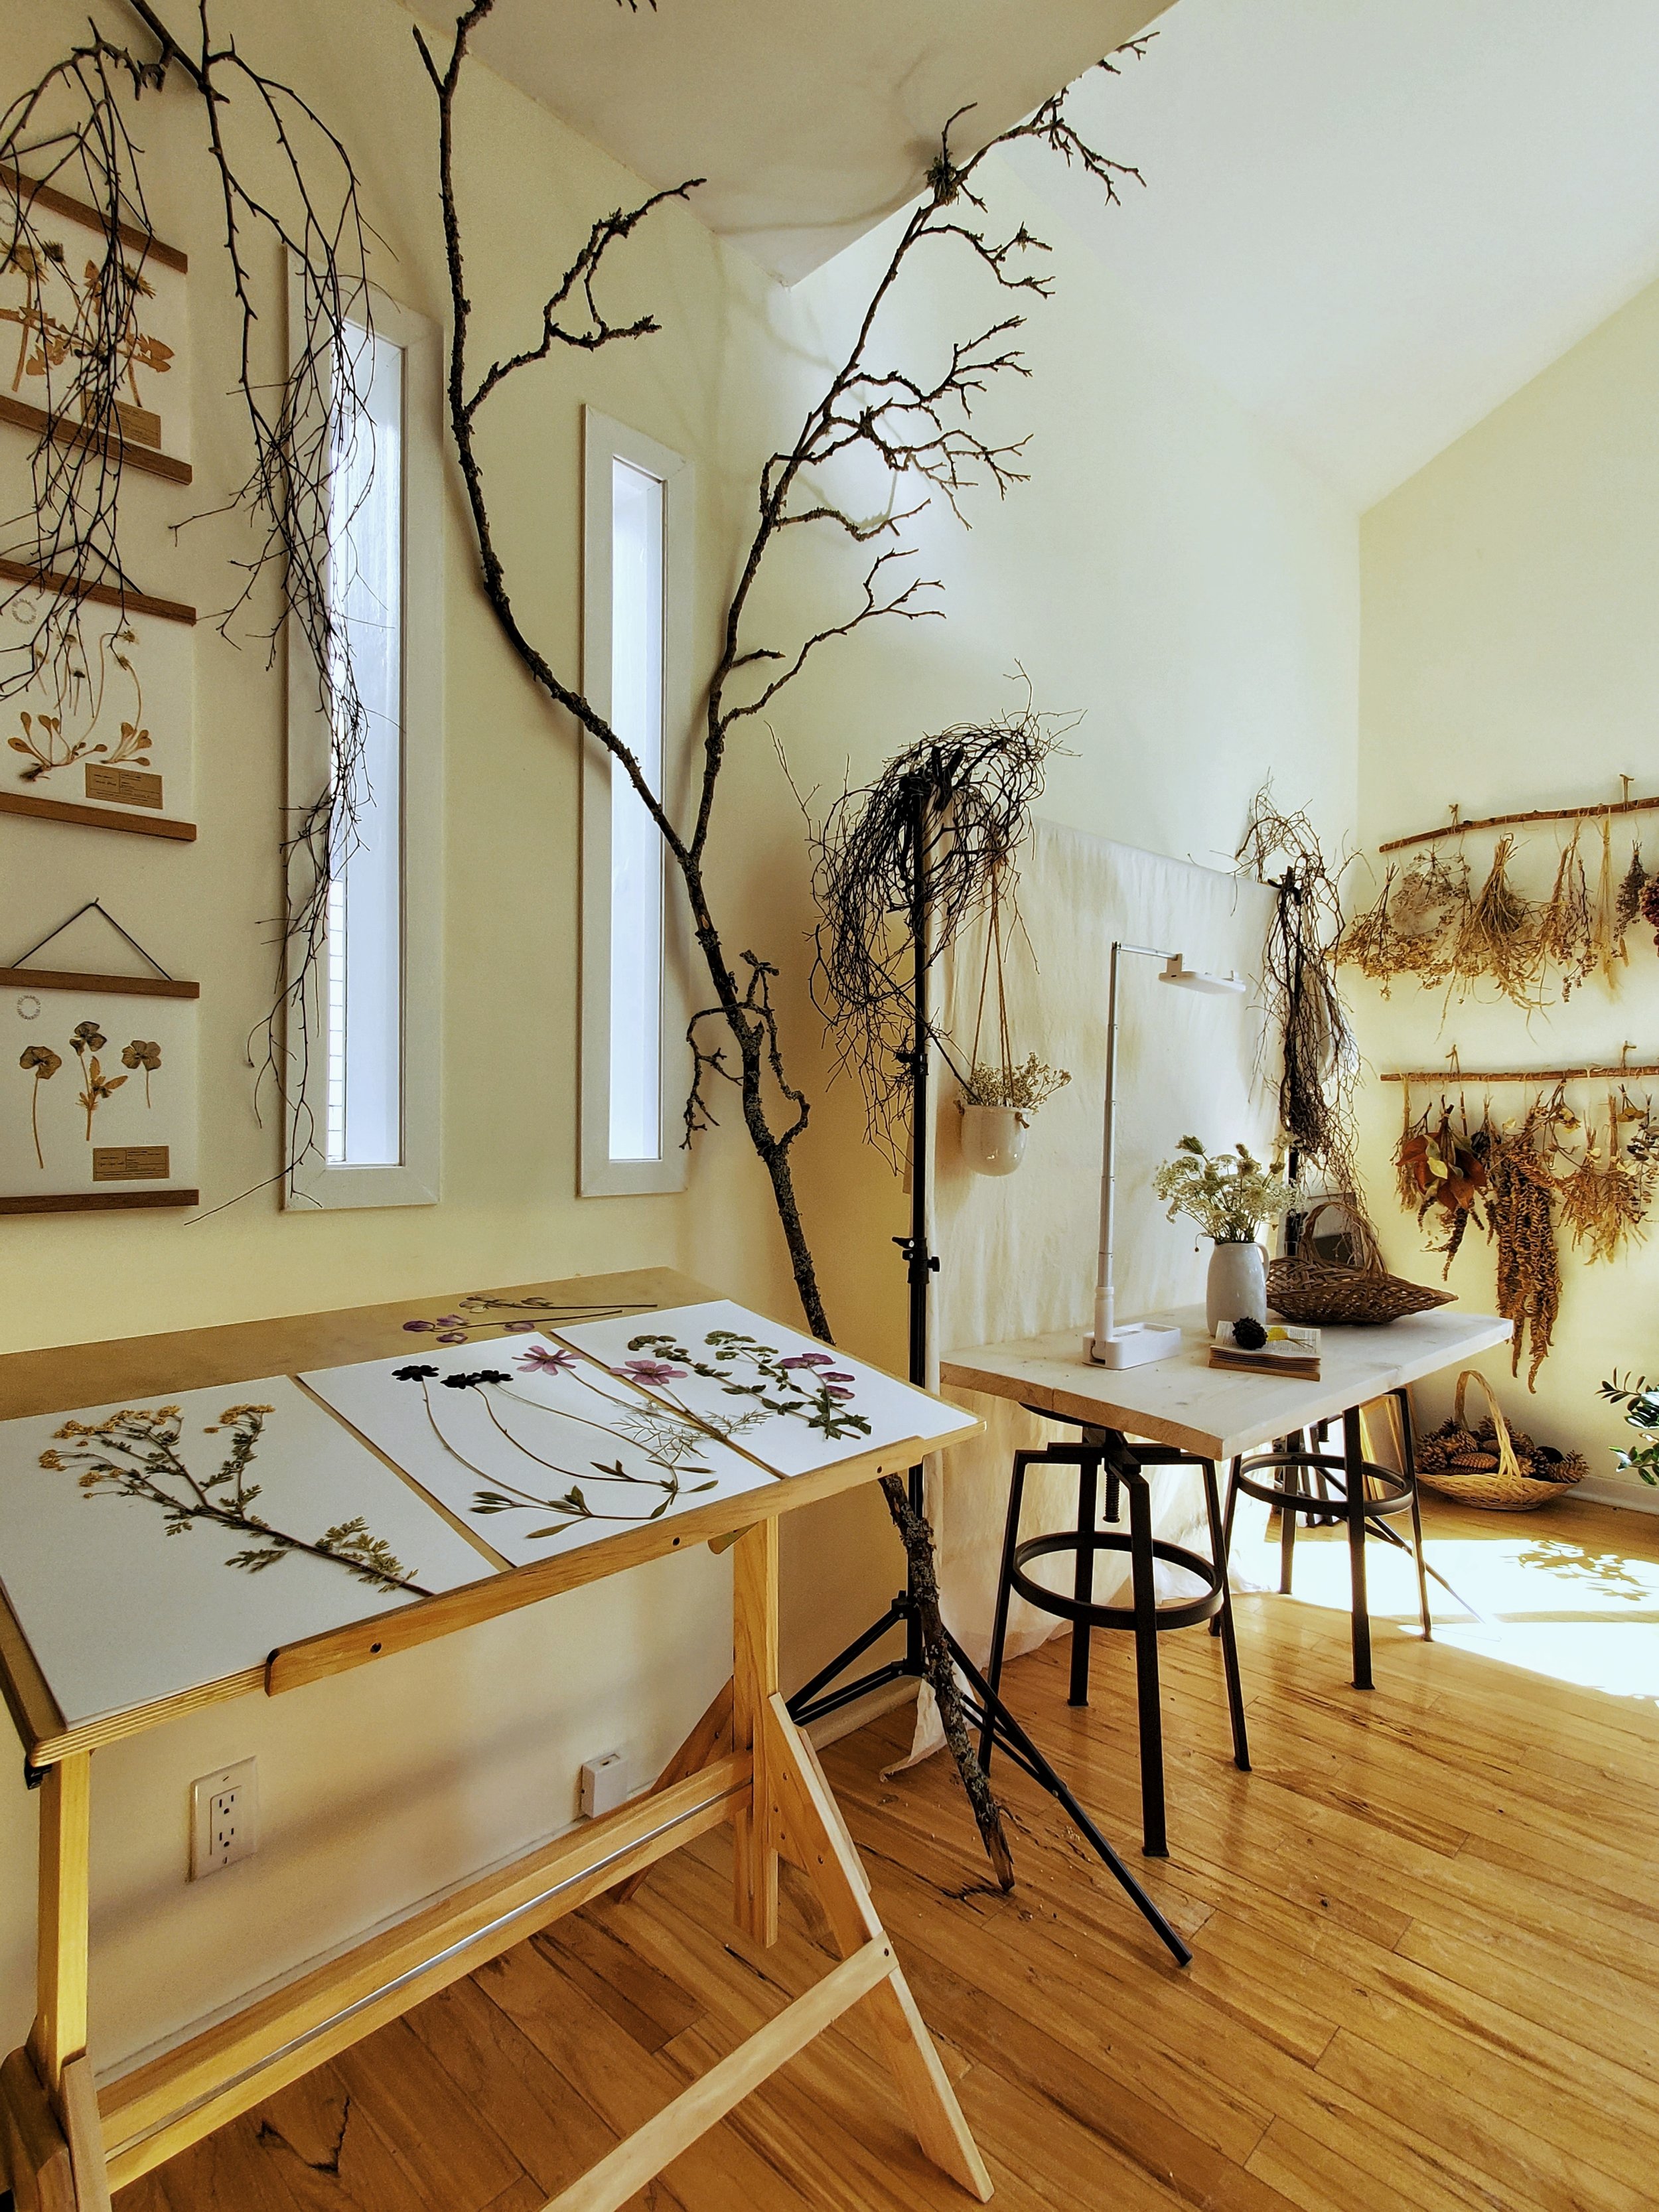


I think of my studio as yet another creative opportunity. Everything that enters this room is as aesthetically pleasing, eco-friendly, and cohesive as possible. Does that mean I once spent two hours searching online for a well-designed, wood-handled tabletop brush and cute metal dustpan to sweep my botanical debris into? Yes, yes it does.
Studio Features
Three big windows, a skylight, and a door that leads directly to my pressing garden
Craft Supply Shelf
Art Table
Storage Nook
Photography Table and Backdrop
Shipping Station
Drafting Table (for storing works-in-progress)
Analog Table (for dreaming/planning/reading)
Digital Desk
Library and Fireplace (yes, it works!)
Studio Essentials
Secateurs, baskets, jars/vases, compost bucket
Presses (in three sizes!)
Tweezers, paintbrushes, glue
Heavyweight paper, both off-white and black, for compositions and specimens
Eco-friendly and beautiful shipping supplies
Paper, notebooks, pens
Books
Plants, dried botanicals, and nature treasures
Seasonal botanical altar
Candles and seasonal scented spritzes
My prints are the result of a process that begins with nature.

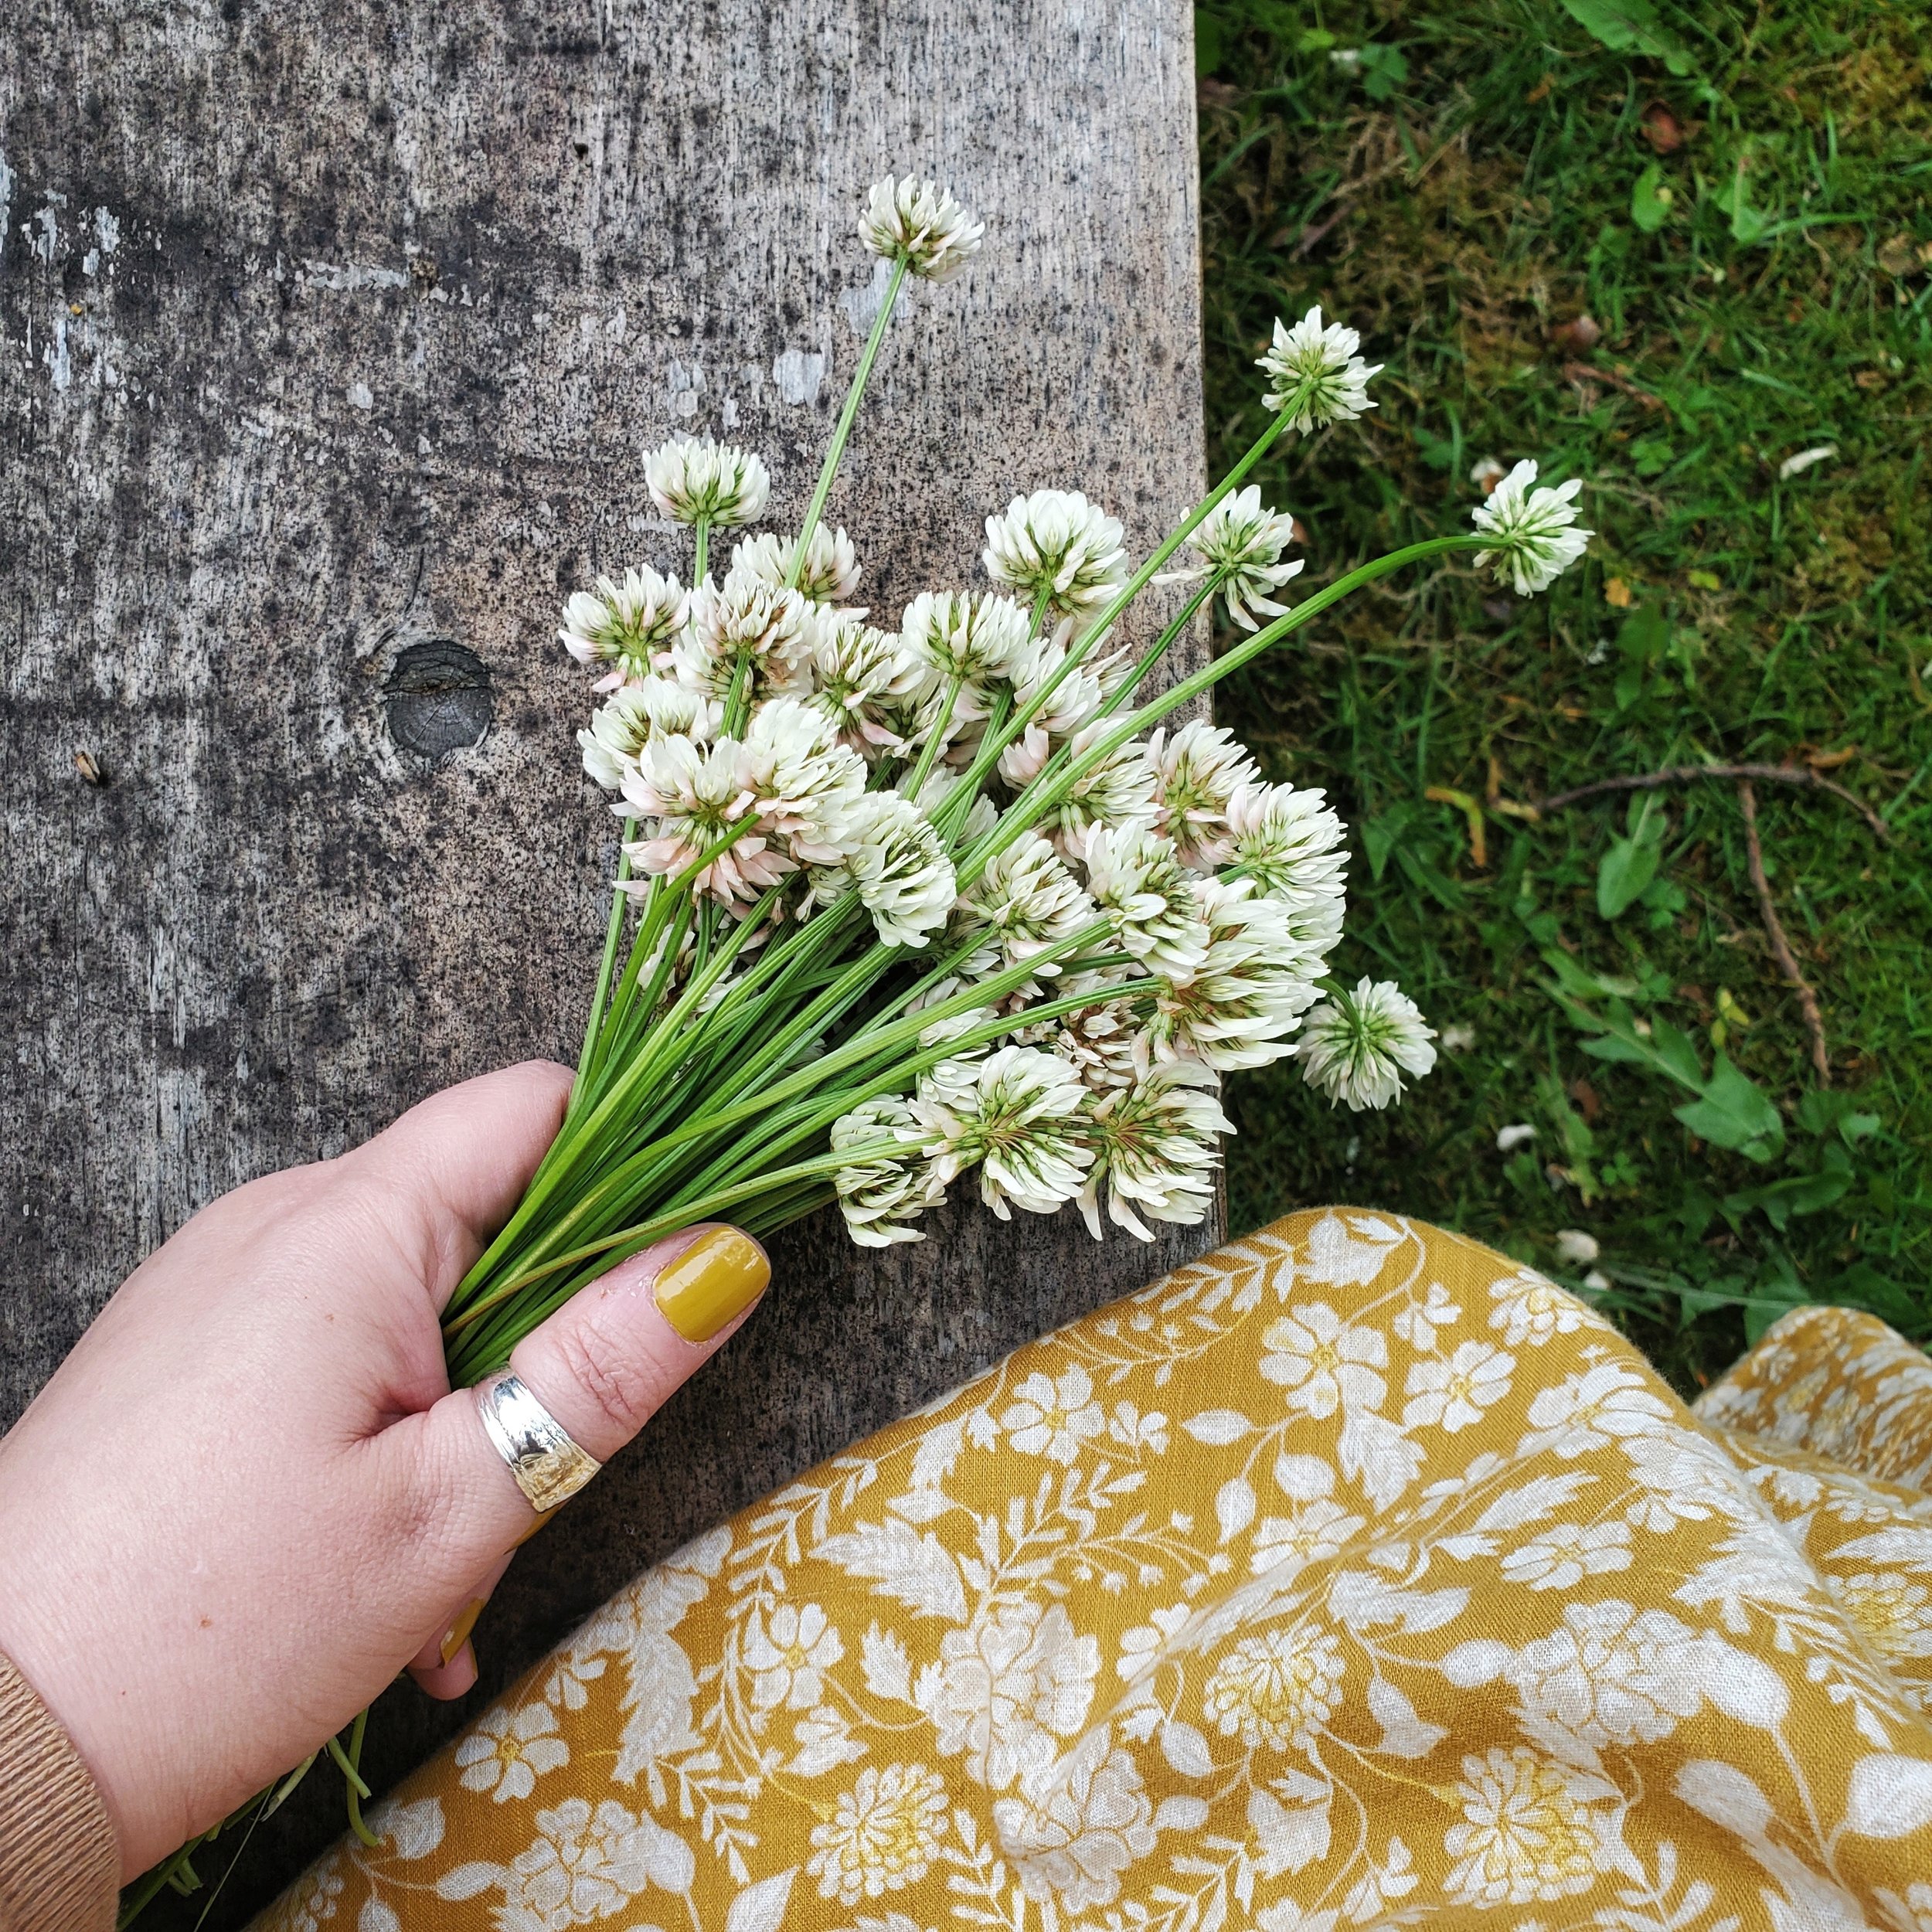
Growing & Gathering
Much of the flora I press comes from the grounds where I live and the surrounding boulevards. It’s always a thrill to head outside with a basket and my secateurs to sustainably and respectfully gather wildflowers, “weeds”, herbs, perennials, native plants, tree blossoms, ferns, leaves, and grasses.
Most of the rest of my flora comes from my pressing garden, where I predominantly grow cottage garden style annuals and perennials from seeds and starts in containers.
I’ve also occasionally been let loose in the gardens of friends and family (sometimes in exchange for loaves of my homemade sourdough). Plus, there have been times when thoughtful pals have turned up at my door with flowers they thought I might like to try pressing.


Knowledge
Since we are in relationship to each other, it’s important to me to learn the names of all my plant friends, so if I’m not already familiar with a plant, I make sure to identify it (thanks, PlantNet) and learn a little bit about it.
I also like to look up each plant to discover the lore and meanings around it according to floriography (the Victorian language of flowers) and flower magic. I’m creating an alternative floriography too, particularly for flowers with correspondences that seem oppressive (for example, associating white flowers to innocence and purity, when black/white dichotomies can be considered white supremacist).

Pressing
Once picked, I trim and tidy up the flowers and place them into presses as quickly as possible.
I have a dozen custom-made (by me) presses. The pressing “plates” are made of ½” plywood and the presses are held together with Velcro cinch straps. They may not be quite as pretty as presses held together with bolts and wingnuts, but the cinch straps apply more even pressure and allow for easier stacking.
Within the plates, flora is sandwiched between layers consisting of reusable corrugated cardboard and multiple sheets of printer paper. For particularly thick or damp flowers, as well as white flowers, I change the papers every 12 hours or so for the first few days. This keeps flowers from turning brown or moldy. I also tighten the cinch straps once or twice over the first couple of days. Sometimes I even open the presses after a day or two to carefully rearrange petals and leaves with tweezers while they’re still pliable.
Each press is stamped with a number so I can keep track of its contents and drying times. After three weeks, most flora is fully dried and pressed and ready to be removed, which is always exciting!

Storing and Tracking My Collection
When I empty the presses, the pressed flora gets organized by colour and then filed alphabetically on layers of cardstock that are covered with white tissue paper and slipped into clear sleeves and labelled. The sleeves are then stored flat in drawers where they are out of the light, dry, and safe.
To keep track of my collection, I mount one of every flower on a small card. I call this my “visual inventory”. I use these cards to select new flower palettes to help minimize the risk of overhandling the pressed flowers. Flowers that don’t fit on the cards are catalogued in a notebook.

Creating
I spend a lot of time working on my compositions, going through several drafts and photographing each one to keep track of changes. Once I’m happy with my design, I “paint” the back of each flower with a white, neutral pH, non-toxic glue and, using tweezers, affix it to the paper I’m working on. It’s a very delicate, time-consuming, and meditative process.
Specimens go through the same process, but don’t take nearly as long to create.

Prints
Giclée prints of my compositions and specimens are made by a graphic professional who also handles the scanning process, ensuring a high-quality capture that preserves the colour and detail of the original artwork. The result is archival-quality (also known as “museum-quality”) reproductions printed with fade-resistant pigment inks on 100% cotton, acid-free, smooth, matte, heavyweight paper.
One thing I can tell you is that the prints are so good that it’s hard to even tell a print apart from the original (the print is on the right in the photo).
Other Things
Jill Margo Herbarium is fully DIY in terms of branding, photography, website building, graphic design, packaging, social media, and so on. As a whole, it brings together skills I’ve honed (and am still honing) over a lifetime.
