
STUDIO & PROCESS
My studio is my favourite place to be and to bring the outside in.
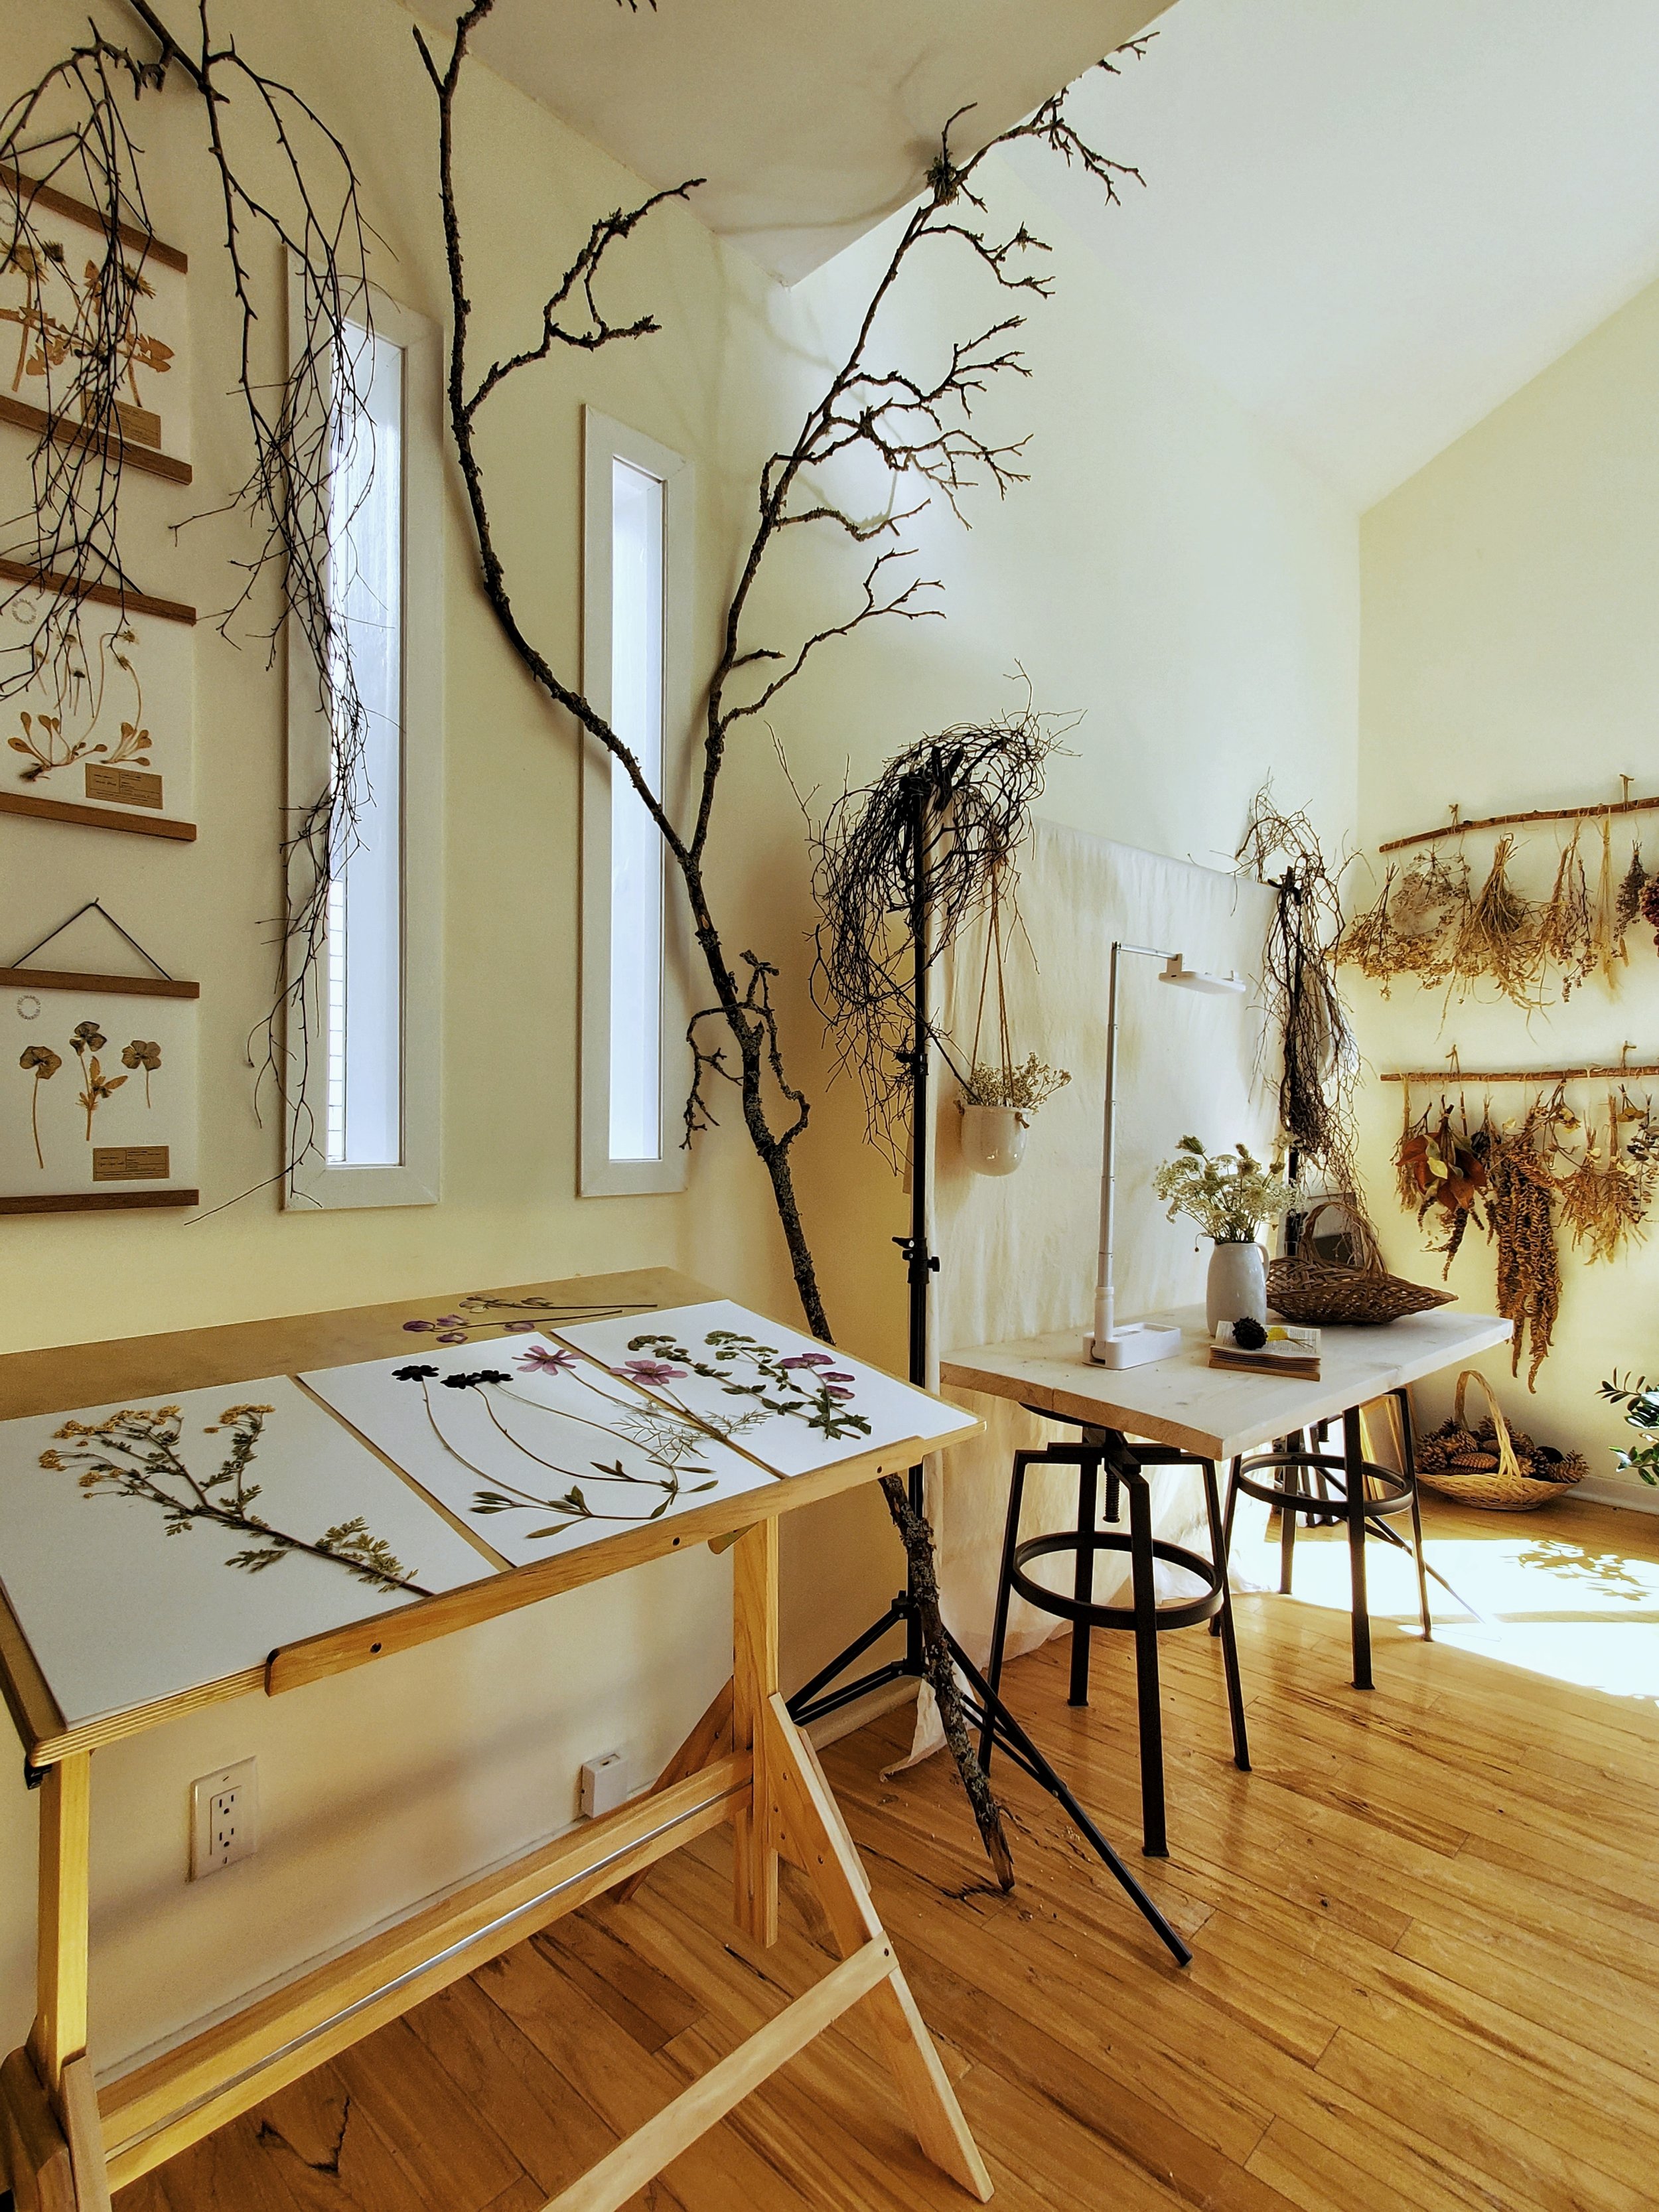


I think of my studio as yet another creative opportunity. Everything that enters this room is as aesthetically pleasing, eco-friendly, and cohesive as possible. Does that mean I once spent two hours searching online for a well-designed, wood-handled tabletop brush and cute metal dustpan to sweep my botanical debris into? Yes, yes it does.
Studio Features
Three big windows, a skylight, and a door that leads directly to my pressing garden
Craft Supply Shelf
Art Table
Storage Nook
Photography Table and Backdrop
Shipping Station
Drafting Table (for storing works-in-progress)
Analog Table (for dreaming/planning/reading)
Digital Desk
Library and Fireplace (yes, it works!)
Studio Essentials
Secateurs, baskets, jars/vases, compost bucket
Presses (in three sizes!)
Tweezers, paintbrushes, glue
Heavyweight paper, both off-white and black, for compositions and specimens
Eco-friendly and beautiful shipping supplies
Paper, notebooks, pens
Books
Plants, dried botanicals, and nature treasures
Seasonal botanical altar
Candles and seasonal scented spritzes
My prints are the result of a process that begins, always, with nature.
Every pressed flower print begins long before the glue and the paper. It begins with soil, with roots, with seasons. With noticing. The process behind each piece is slow, sensory, and rooted in relationship—part garden, part quiet devotion, part small wonder. This is a glimpse into how it all comes together.

Growing & Gathering
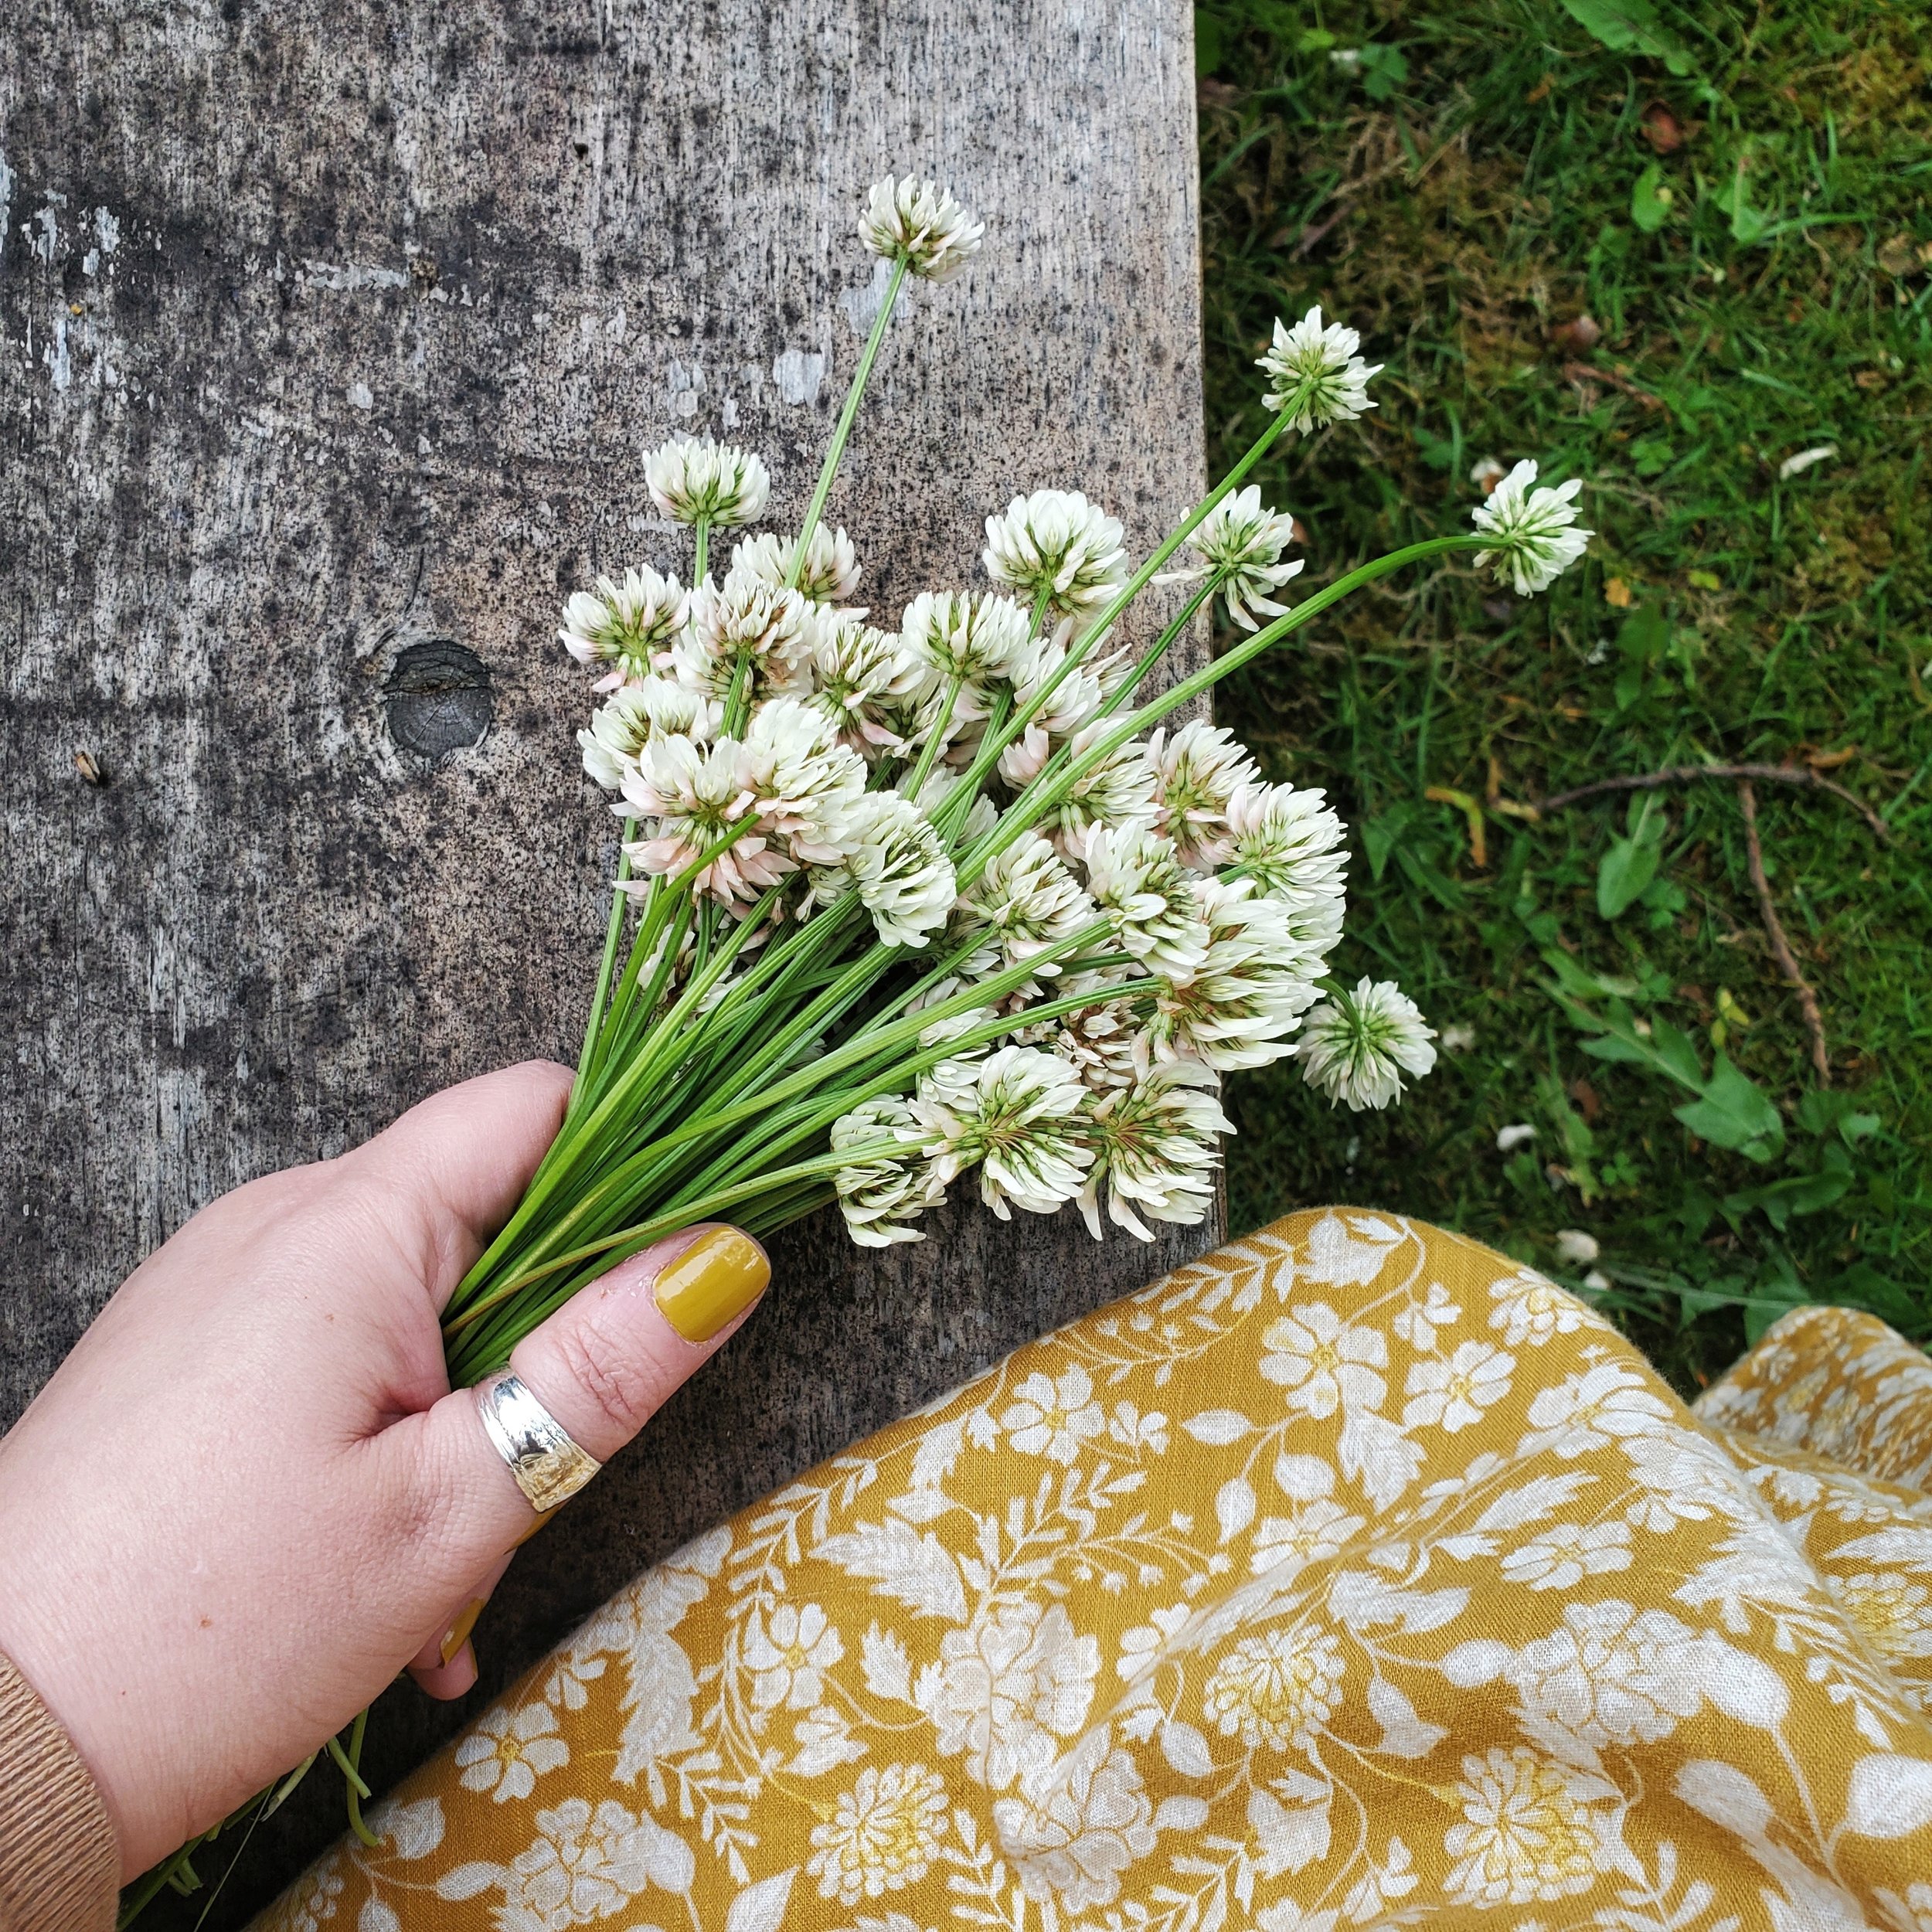
Much of the flora I press comes from the grounds where I live and the nearby boulevards. It’s always a thrill to step outside with my secateurs and a gathering basket to sustainably and respectfully collect wildflowers, “weeds,” herbs, perennials, native plants, tree blossoms, ferns, leaves, and grasses.
The rest is mostly grown in my pressing garden—an ever-evolving patchwork of cottage-style annuals and perennials, grown from seed and starts in containers.
Now and then, I’m invited to forage in the gardens of friends and family (sometimes in exchange for a loaf of homemade sourdough). Occasionally, a thoughtful friend shows up with flowers they think I might like to press. It’s the loveliest kind of offering.


Knowledge
Because we’re in relationship, I like to learn the names of my plant companions. If I’m unfamiliar, I’ll identify the species (thanks, PlantNet) and take time to learn a little more about it.
I also explore each flower’s symbolic meaning—both from the Victorian language of flowers (floriography) and from contemporary plant magic. Over time, I’ve been developing my own rebellious floriography, especially when traditional meanings reflect oppressive ideas (like associating white flowers with purity, which echoes white supremacist values). There’s room for a more expansive, inclusive language—and I’m working toward it.
Lately, I’ve also been writing about these things—quietly, steadily—letting the ideas take root alongside the flowers. Something is growing (but first I have a novel to finish!)

Pressing
Once gathered, the flora is trimmed, tidied, and placed into presses as soon as possible.
I’ve built a dozen custom presses using ½-inch plywood and Velcro cinch straps. They might not be as picturesque as ones with bolts and wingnuts, but they apply more even pressure and make for easy stacking (form follows function, in this case).
Inside, each specimen is nestled between layers of reusable corrugated cardboard and printer paper. For thick or moisture-rich flowers—and especially white ones—I change the paper every 12 hours or so for the first few days to prevent browning and mould. I also tighten the straps once or twice in that early stage. Occasionally, I open the presses to gently rearrange petals and leaves with tweezers while they’re still pliable.
Each press is stamped with a number so I can track what’s inside and when it went in. After about three weeks, most pieces are dry and ready to be removed—which is always a little bit magical.

Storing and Tracking My Collection
Once preserved, each flower is sorted by colour, filed alphabetically, and stored on layers of white tissue-covered cardstock inside clear sleeves. These are kept flat in drawers—out of light, safe, and dry.
To keep track of what I have on hand, I mount one of each flower on a small card—a “visual inventory” that helps me create palettes without overhandling the delicate originals. Any flowers that don’t make it onto a card are noted in a catalogued notebook.

Creating
I spend a long time developing each composition—moving pieces around, trying variations, and photographing each stage so I can track the evolution of a piece. When the design feels just right, I “paint” the back of each element with a white, neutral pH, non-toxic glue and, using tweezers, carefully affix it to the background paper.
It’s a delicate, meditative process—slow, precise, and deeply absorbing.
Specimens follow the same process, though they come together more quickly.

Prints
Once a composition is complete, I work with a trusted graphic professional who handles both scanning and printing with exquisite care. The scans are colour-accurate and detail-rich, capturing even the most delicate shadows and textures.
The resulting giclée prints are archival-quality (also called museum-grade), made using fade-resistant pigment inks on heavyweight, 100% cotton, acid-free matte paper.
People often ask whether they’re looking at an original or a print. I always take it as the highest compliment.
If you’d like to gather a piece of the garden for yourself, you’re warmly invited to visit the shop. You’ll find giclée prints made with care—and, once a year, a small harvest of calendars to mark the turning seasons.
